Revisit of RobotML-sdk Installation
What was presented in the user guide, is now detailed for each of the component and using the manual installer. Other tools installation are detailed and are associated to page of their own as indicated.
Installer
Run proteus.run in:
with the following command in a terminal (do not sudo):
sh proteus.run
You will need to provided you login and password for the repository. And your root pass as well to install the packages.
nb: in case of download or network failure, you can restart this script when you want. It will overwrite the configuration without re-downloading what was already done.
Installation tool: Run in Terminal
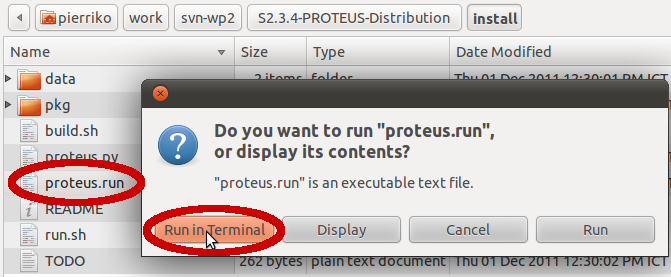
Click on “Run in Terminal“
Installation tool: login
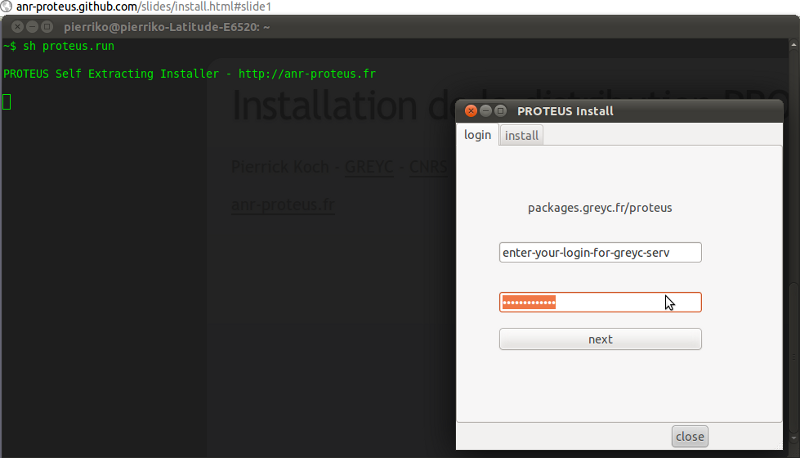
Login and password for the repository
Installation tool: next
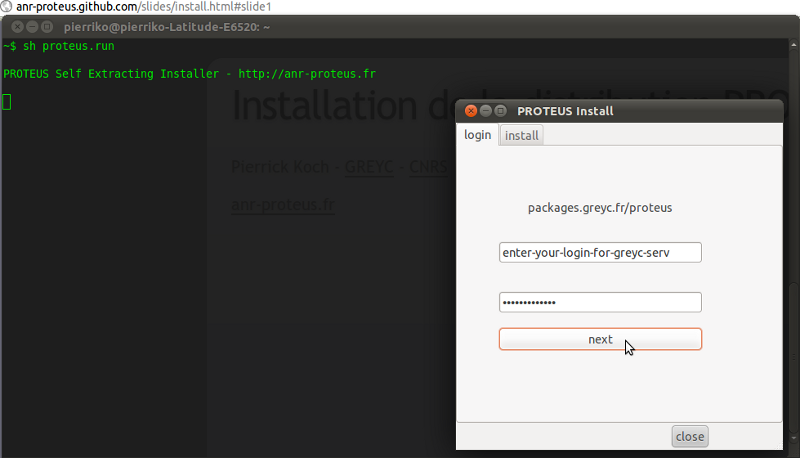
Next...
Installation tool: choose apps
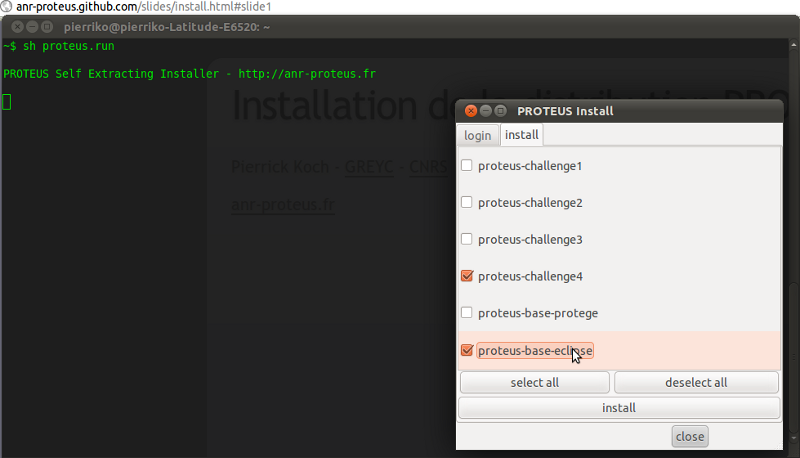
Choose your packages
Installation tool: install
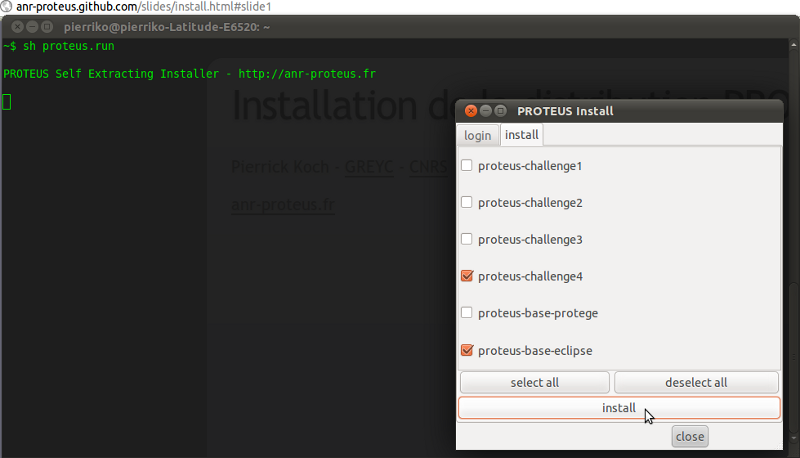
Install...
Installation tool: checking password
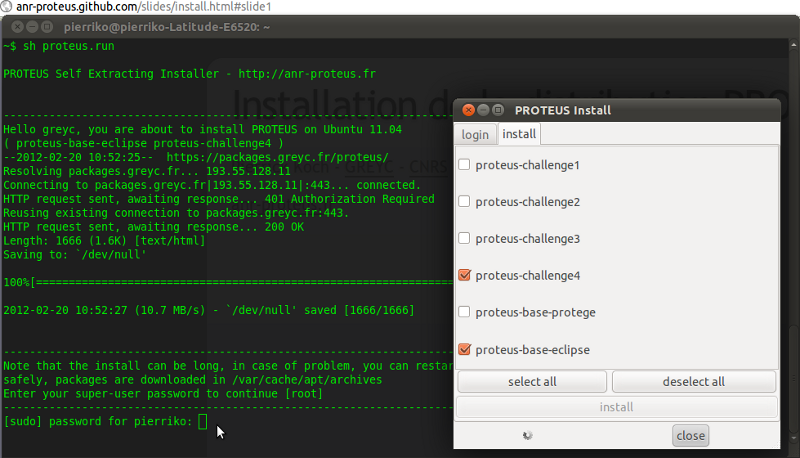
Checking your password for packages.greyc.fr/proteus
Installation tool: root
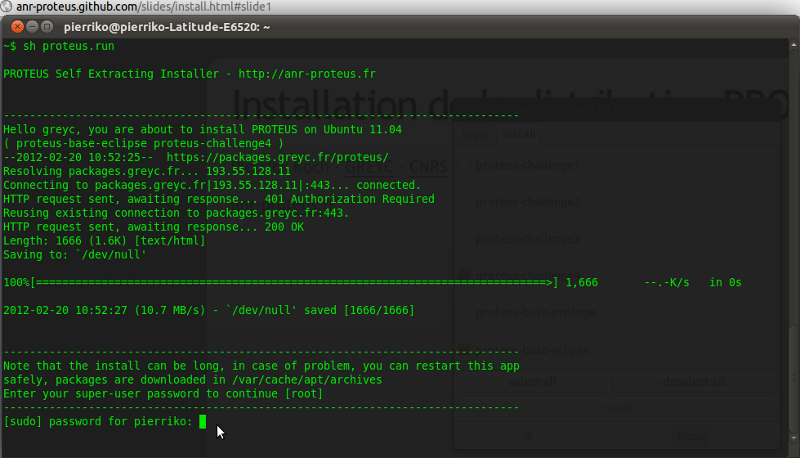
Give your root password (aka. super user)
Demo / Tests
A MORSE presentation containing examples and video is available at: bit.ly/proteus2
Installation: Eclipse
version: Eclipse Modeling Indigo (3.7) & Papyrus 0.8.2
sudo apt-get install proteus-base-eclipse
Open proteus-base-eclipse in Software Center
Update
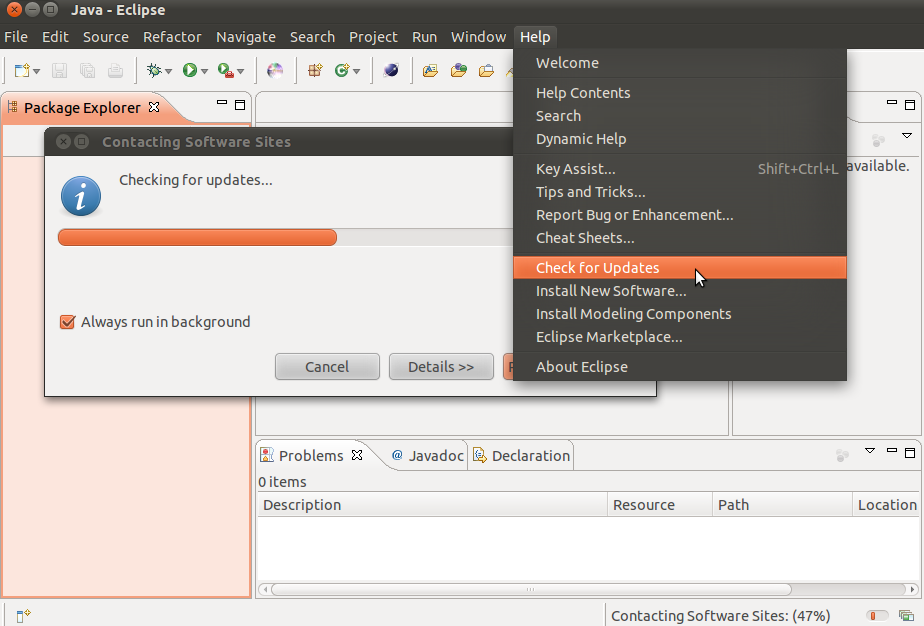
eclipse-update
Installation of frameworks
Installation: CycabTK
version: 2.0
sudo apt-get install proteus-cycabtk
Open CycabTK in Software Center
Test install
Run the following command in a terminal:
mgengine
Then, in mgengine console
require "tutorial"
Which should display a vehicle with a camera, a laser scanner and two infrared sensors.
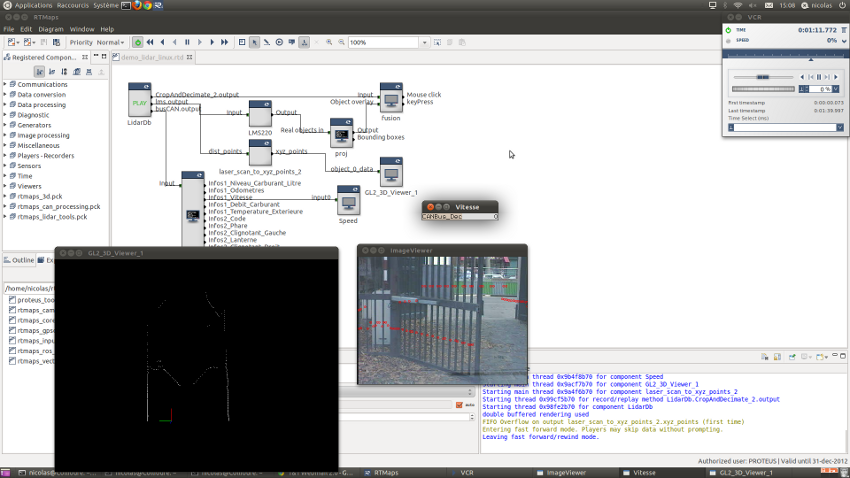
Installation: RTMaps
version: 4.0.1
sudo apt-get install proteus-rtmaps
Test install
Run the following command in a terminal:
rtmaps /opt/rtmaps/samples/demo_lidar_linux.rtd
Update the distribution
First, you need to update the repositories list:
sudo apt-get update
Then, upgrade your packages:
sudo apt-get upgrade
Remove a package
sudo apt-get remove vle
and autoremove to clean the former dependencies:
sudo apt-get autoremove
SVN
This asset is mandatory for accessing Formal Robotician portal elements. Some assets can be accessed directly through the portal itself.
Specific documentation can be found following this link.
Proxy
To update root’s proxy settings:
sudo gnome-network-properties
or see sudo -i:
The -i (simulate initial login) option runs the shell specified in the
passwd(5) entry of the target user as a login shell.  This means that
login-specific resource files such as .profile or .login will be read by
the shell.  If a command is specified, it is passed to the shell for
execution.  Otherwise, an interactive shell is executed.  sudo attempts to
change to that user's home directory before running the shell.  It also
initializes the environment, leaving DISPLAY and TERM unchanged, setting
HOME, MAIL, SHELL, USER, LOGNAME, and PATH, as well as the contents of
/etc/environment on Linux and AIX systems.  All other environment
variables are removed.
or with pip --proxy:
sudo pip install --proxy=http://myproxy:8080 -U rosinstall
That’s all Folks!
short link to this presentation: bit.ly/proteus1

1 page doc: bit.ly/proteus1md
sources on GitHub: bit.ly/proteus-src